Christmas Lights “Joy” Fun Fold Card & Video
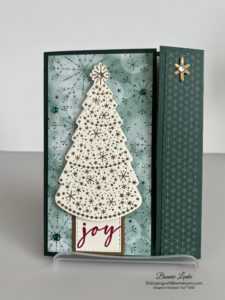
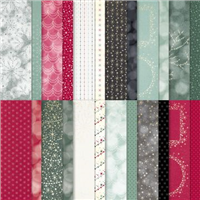
I love making Christmas Cards, they are my favorite ones to make and the one I’m sharing with you today is no exception. Plus, it’s always enjoyable to do a Fun Fold Card, even if it’s just a minor change from a standard fold. One reason Christmas Cards are my favorite, besides what the season means to me, is all the beautiful colors and the beautiful Designer Series Papers that are available. The Lights Aglow paper is no exception and so many card ideas are running through my mind. This is my first one for the Christmas Lights bundle. I also made a second one using the Cherry Cobbler Cardstock.
The first card I ever made was using the heat embossed technique on a ornament, that’s when I instantly became hooked on making cards. This card is also heat embossed with the gold embossing powder. I hope you enjoy you’ll fall in love with it and want to make one. If you don’t have a Stampin’ Up Demonstrator, I would love to be that person for you. Please let me know if I can help you in any way.
CLICK FOR CHRISTMAS LIGHTS VIDEO
Let’s Get Started
- Fold your card base on the score lines and burnish with Bone Folder.
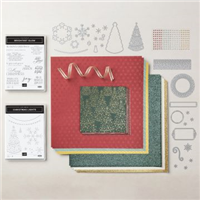
- Adhere both pieces of the Lights Aglow Designer Series Paper to the card front, the larger piece on the left and the smaller piece on the right.
- Stamp the tree stamp, using the Stamparatus, from the Christmas Lights Bundle on Very Vanilla Cardstock with VersaMark and heat emboss with Gold Metallic Embossing Powder. Cut out with the corresponding Twinkling Lights Die.
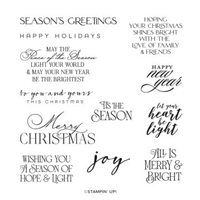
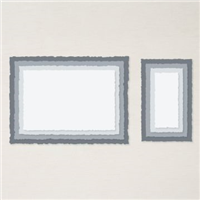
- For the greeting use the “Joy” stamp from the Labels Aglow stamp set and stamp in Cherry Cobbler Ink on Very Vanilla Cardstock. Cut out with the smallest Stitched Rectangle Die with the short side for the width and the word close to the bottom of the die. The word will be very tight and a hair of the “Y” might be cut off.
- With the 2nd smallest Deckled Rectangle Die cut out one out of the Soft Suede Cardstock. Adhere the Greeting to the Soft Suede (this is your tree stump). Cut the greeting down to 1-1/4” tall. Adhere this to the left side of the card front with Stampin Seal, centering it.
- Adhere the Gold Emboss Christmas Tree to the card front, centering it on your Joy tree stump with Dimensionals.
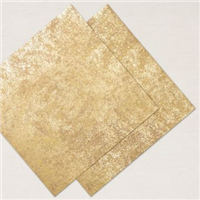
- Cut a Star out of Distressed Gold Specialty Paper with the star from the Twinkling Lights Die. Adhere to right side of card front with a Glue Dot.
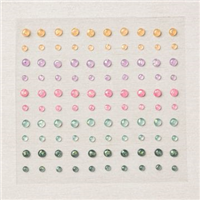
- For the embellishments add a large Basic Rhinestone Gem to the center of the Gold star and a medium one to the star on the top of the tree. I then adhered 3 of the Evening Evergreen 2021 – 2023 In-Color Opal Rounds Gems to the card front. I tried to put mine in the middle of the snowflakes.
- For the inside of the card stamp the tree stamp using the Stamparatus on a piece of Very Vanilla Cardstock with Soft Succulent Ink after stamping off once first. Stamp your verse from the Brightest Glow stamp set in Evening Evergreen Ink. Stamp the “Merry Christmas” stamp from the Hope & Peace stamp set in Cherry Cobbler Ink. Adhere this cardstock to the card inside.
- Stamp the “Made with Love” stamp from the Limited-Edition stamp set in Evening Evergreen Ink on the card back.
And now you have a beautiful Christmas card to brighten someone’s day.
Happy Stamping!
Card Recipe
Cardstock:
- Evening Evergreen: 8-1/2” x 5-1/2”, scored at 3” and 7-1/4”, This is your card base
- Very Vanilla: 3” x 4-3/4” for tree, 1-1/2” x 3”, 4” x 5-1/4” card inside.
- Soft Suede: Scrap
- Distressed Gold Foil: Scrap
- Lights Aglow DSP: 2-3/4” x 5-1/4”, 1” x 5-1/4”
Supplies Used:
- Stamps: Christmas Lights, Brightest Glow, Hope & Peace
- Dies: Twinkling Lights, Labels Aglow, Stitched Rectangle Dies, Deckled Rectangle Dies
- Cardstock/Paper: Evening Evergreen, Very Vanilla, Soft Suede, Distressed Gold Specialty Paper, Lights Aglow Designer Series Paper
- Stampin Pads: Evening Evergreen, Cherry Cobbler, Soft Succulent, VersaMark
- Embellishments: 2021 – 2023 In- Color Opal Rounds, Rhinestone Basic Jewels (retired)
- Others: Stampin Emboss Powders – Metallic (Copper, Gold, Silver), Embossing Buddy
- Adhesives: Dimensionals, Glue Dots, Liquid Glue, Tear N Tape, Stampin Seal
- Tools: Paper Trimmer, Cut & Emboss Machine, Stamparatus, Clear Blocks, Take Your Pick, Bone Folder, Stampin Pierce Mat, Paper Snip Scissors, Heat Tool