
Adorable Owl Valentine Card & Technique Video
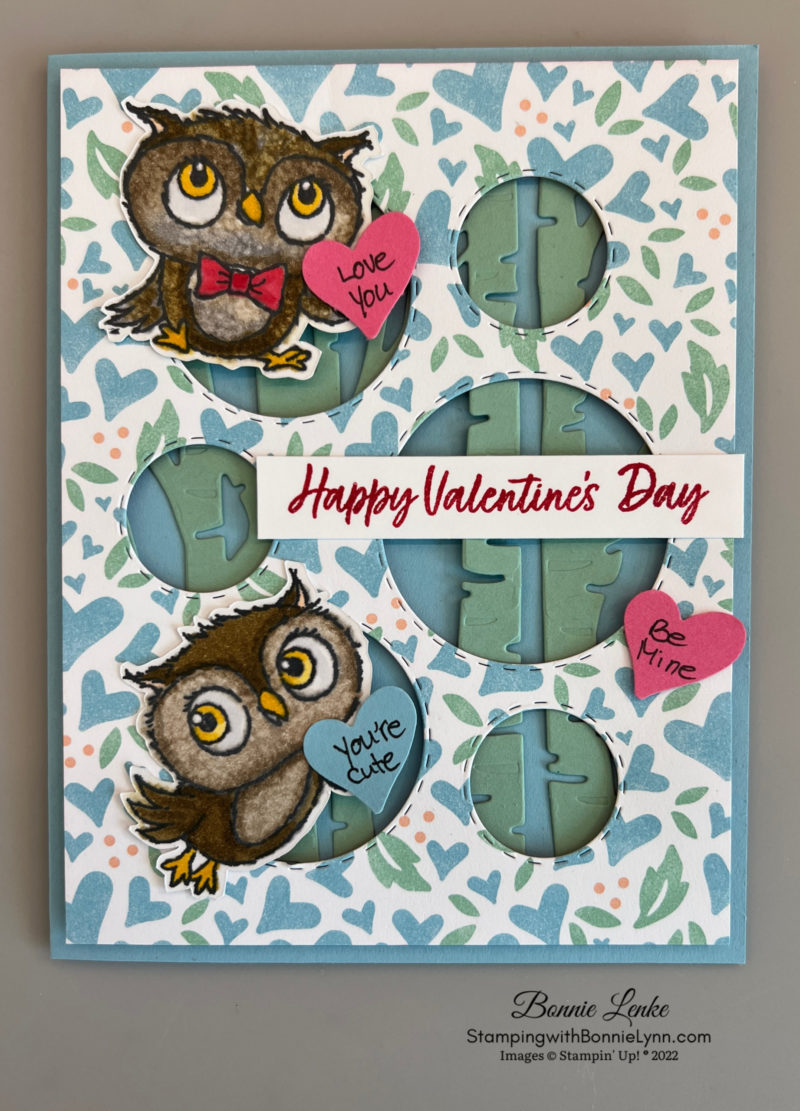
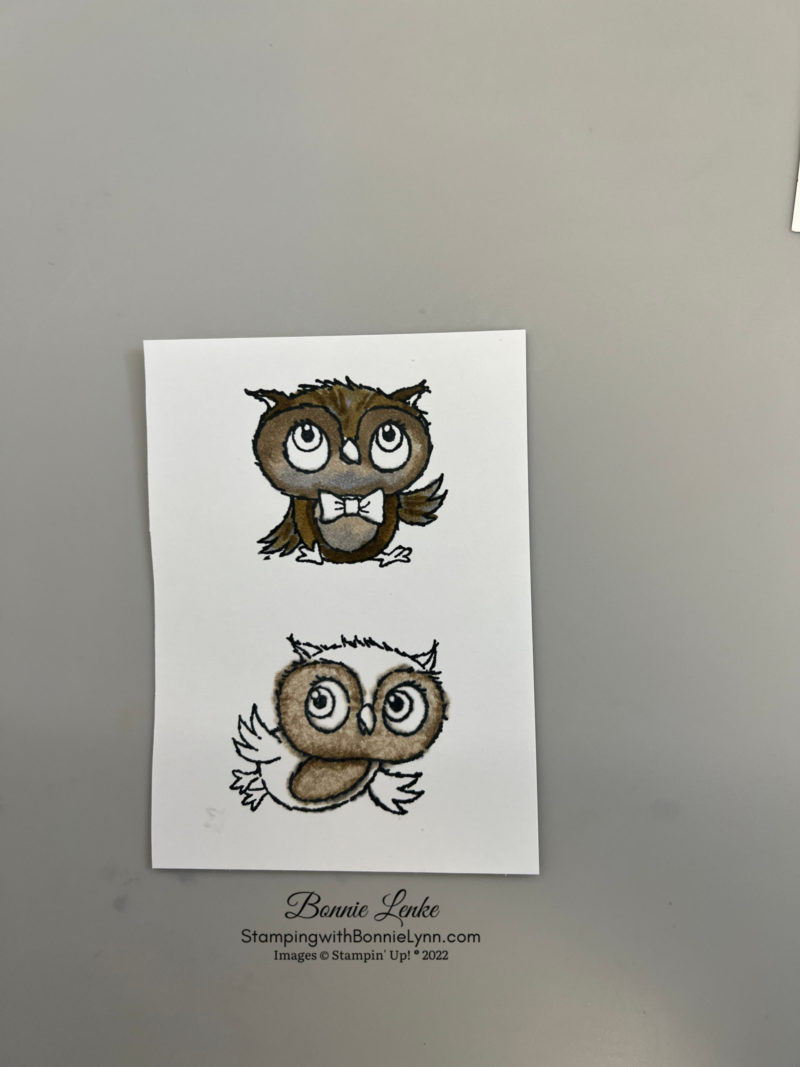
I needed a Valentine’s card for my husband and decided that the Stampin’ Up! Adorable Owl stamp set would be perfect with him. These owls are so cute and just up his alley. I colored the owls with Stampin’ Blends and did a short video on how I gave them the texture. I love to use this texture technique when I’m using shades that don’t blend real well or I’m not up to taking the time to blend the colors. The first photo shows the boy owl after coloring the parts for texture but before I added texture. The bottom, girl owl, if after adding the texture. I forgot to take a picture after adding the texture but you can see it on the card itself.
I hope you enjoyed this card as much as I enjoyed making and sharing it with you.
Let’s Get Started
- I stamped the two owls onto a piece of Basic White Cardstock with Black Memento Ink. For the stomachs and inner face I used the Crumb Cake Blends on the girl owl (without bowtie) and on the boy owl along with light Soft Suede and light Smoky Slate Blends. At this point I finished coloring the body of the boy owl with the Soft Suede Blends plus on the wings I added some Smoky Slate. It was here that I added the texture to the girl (stomach & face) and the boy owl (his feet, nose & bowtie are not yet colored). See short video to see how I did this.
- Finished coloring the girl owl with Soft Suede Blends for the rest of body. Both owls were completed as follow: Dark Petal Pink for inside ears, Daffodil Delight Blends for feet, eyes and nose. I used my Color Lifter to take ink off of the Light Smoky slate and gave the white of the eyes a little color. Real Red was used on bowtie. Fussy cut out both Owls.
- Fold the Balmy Blue Cardstock in half on the score line and burnish with Bone Folder. This is your card base.
- Use the Aspen Tree Die to cut out the panel of Mint Macaron Cardstock. Adhere to Balmy Blue card base.
- The Picture It Die was used to cut out the Country Floral Lane Designer Series Paper. Adhere to card front over the aspen dies with Foam Tape or Dimensionals.
- Stamp Greeting from the Country Bouquet stamp set in Real Red Ink on White Cardstock. Attached to card front with a Glue Dot on each end over the middle large right hole.
- Attach both Owls using a Dimensional (were it sits over the hole) and a Glue Dot to DSP.
- Punch out the small heart of the Country Bouquet Punch in Polished Pink and Balmy Blue Cardstock. Using a 0.3 mm Black Fine Marker (non-Stampin’ Up!) write greetings on the hearts. Attach 3 of them to the card front with Glue Dots.
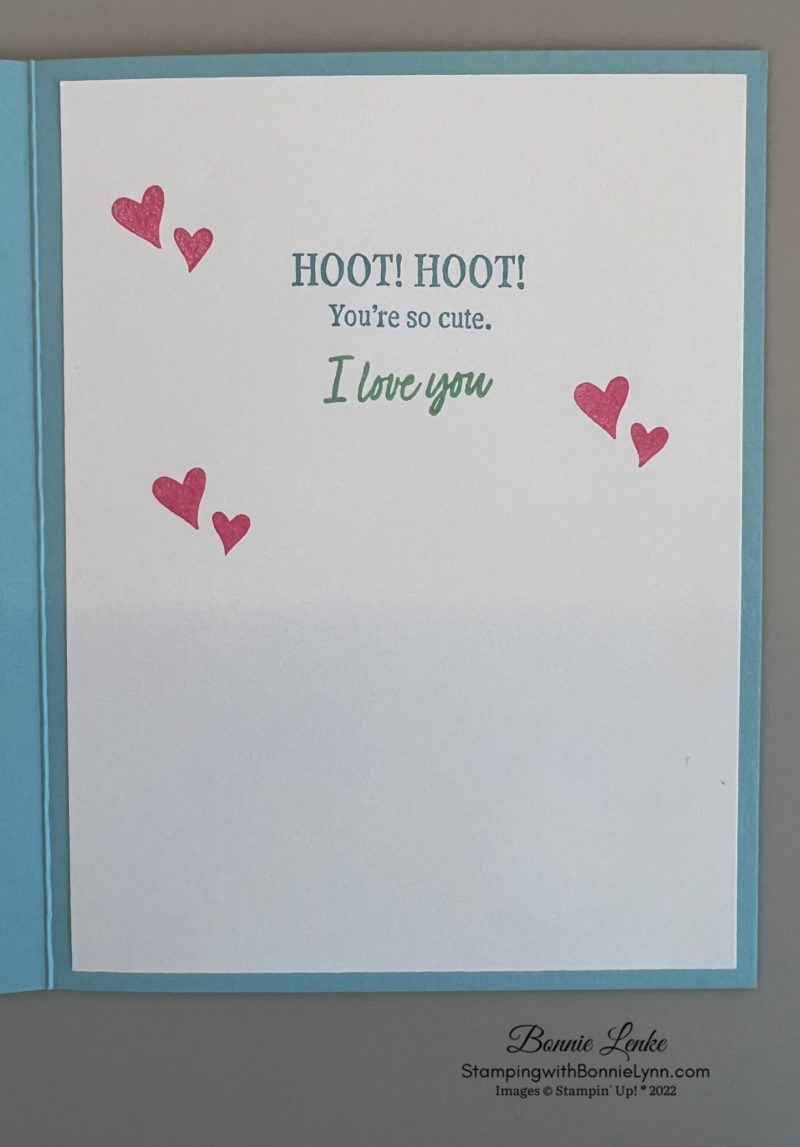
- For the inside I stamped the greeting from the Adorable Owl stamp set in Balmy Blue Ink and the “I Love You”from the Country Bouquet stamp set in Mint Macaron Ink. Stamp the little solid hearts from the same stamp set in Polished Pink Ink. Also, stamp some of these hearts in Polished Pink Ink on the Envelope.
- And now you have a beautiful card to brighten someone’s Valentine’s Day. Don’t forget to give it to someone.

Happy Stamping!
PRINT ADORABLE OWL DIRECTIONS
Card Recipe
Cardstock:
- Balmy Blue: 8-1/2” x 5-1/2”, scored at 4-1/4” (card base), scrap to punch heart
- Mint Macaron: 3-7/8” x 5-1/8” (aspen trees)
- Basic White: 1/2” x 2-7/8” (greeting), 4” x 5-1/4” (inside)
- Polished Pink: Scrap
- Designer Series Paper: 4” x 5-1/4” (card front)
Supplies Used:
- Stamps: Adorable Owls, Country Bouquet
- Dies: Aspen Tree Dies, Picture It Dies, Country Bouquet Punch
- Cardstock/Paper: Balmy Blue, Mint Macaron, Basic White, Polished Pink
- Stampin Pads: Balmy Blue, Mint Macaron, Polished Pink, Black Memento Ink
- Stampin’ Blends: Soft Suede, Crumb Cake, Light Smoky Slate, Daffodil Delight, Dark Petal Pink, Color Lifter
- Adhesives: Dimensionals, Glue Dots, Liquid Glue, Foam Tape, Stampin Seal
- Tools: Paper Trimmer, Cut & Emboss Machine, Stamparatus, Clear Blocks, Take Your Pick, Bone Folder, Stampin Pierce Mat
Rain or Shine Shadowbox Sampler Class
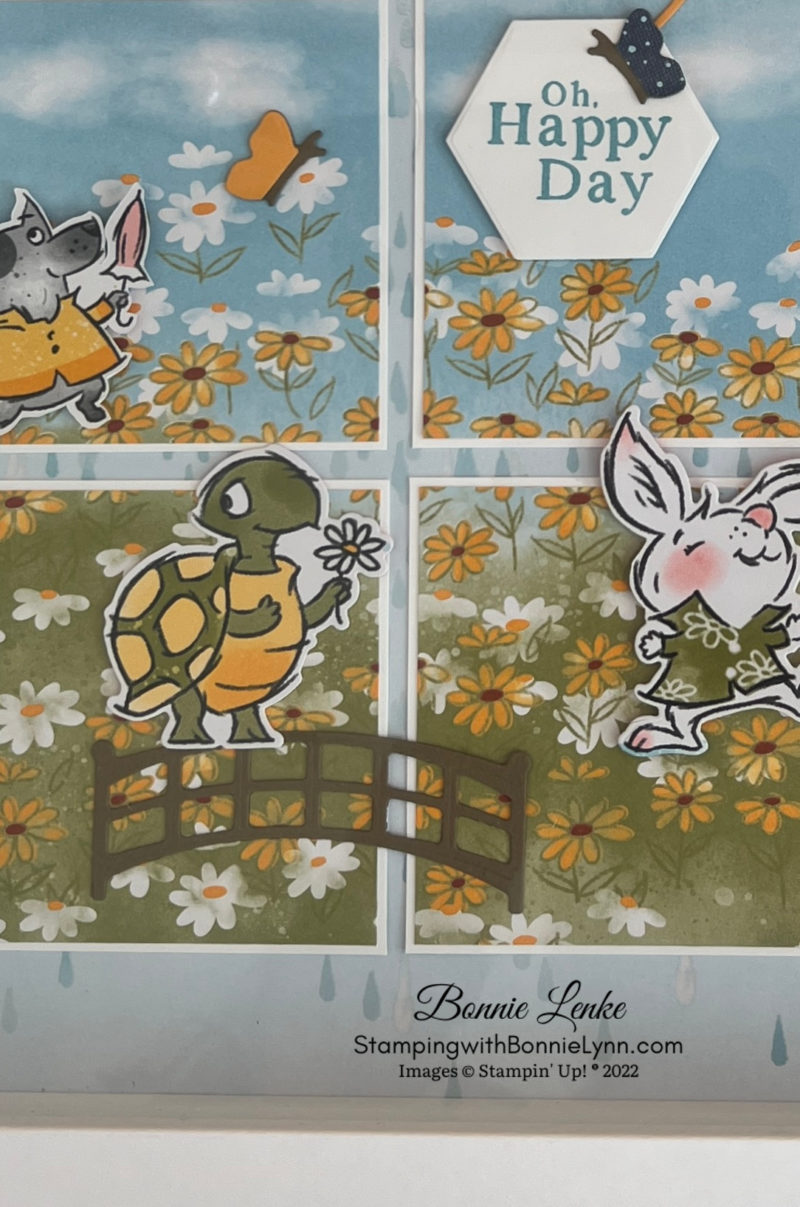
The Rain or Shine Designer Series Paper is so cute and perfect for a Springtime Shadowbox. Above it a sample of the Sampler you’ll make for this class. You have options of an online or in-person class.
Option #1: In person on March 18th. Cost is $30 for the Sampler (shadowbox frame not included). The class includes a package of Rain or Shine Designer Series Paper and everything needed to complete your Sampler plus one card.
Option #2: Order the Rain & Shine Suite item #160556 for $85.25 by February 28th and use host code GNYRM6AS on your order and you’ll receive the directions free. Already own the suite, spend the same amount using the host code and still qualify for the free instructions. Please make sure you contact me, Bonnie@Stampingwithbonnielynn.com to let me know to send you the directions. This also qualifies you for one free Sale-A-Bration item plus 3 bonus points towards free merchandise from me. CLICK HERE TO SHOP
Option #3: Buy the kit for $30 plus $9.50 for shipping. This does include a new package of the Rain or Shine Designer Series Paper. Contact me to order this and I’ll send you an invoice. Need to receive payment no later than February 28th. This also included directions and supplies for 2 cards. Contact me at Bonnie@Stampingwithbonnielynn.com
I’m sorry that my web site person has been having problems setting up the commerce on my site. I’ll have to send you a PayPal invoice. We’re working on this for future offers.

SALE-A-BRATION
Shop and Earn Free Products
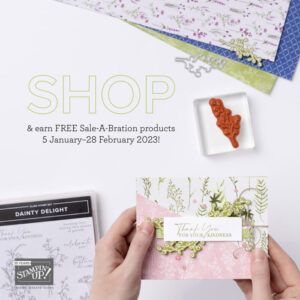
I hope that you’re as excited about SALE-A-BRATION as I am. I love when it’s Sale A-bration time. Enjoy a FREE product from the Sale-a-bration Brochure for EVERY $50/$100 order you place now through February 28, 2023. No limit!
CLICK HERE TO SHOP
Earn Reward Points quickly for a $25 Credit
When placing an order please use the current Host Code* and earn REWARD POINTS. Once you earn 10 reward points you will receive a $25 shopping credit from me. CLICK HERE for more details.
*NEWEST HOST CODE is always located on the right side of webpage midway down.
Love the owl valentine and I’m looking forward to the shadowbox class next month!