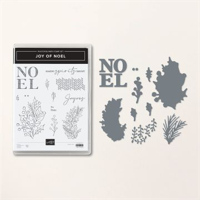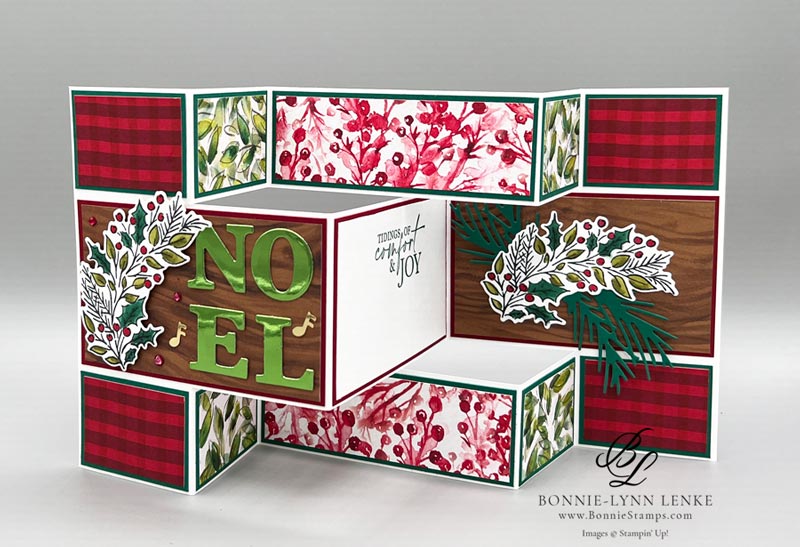
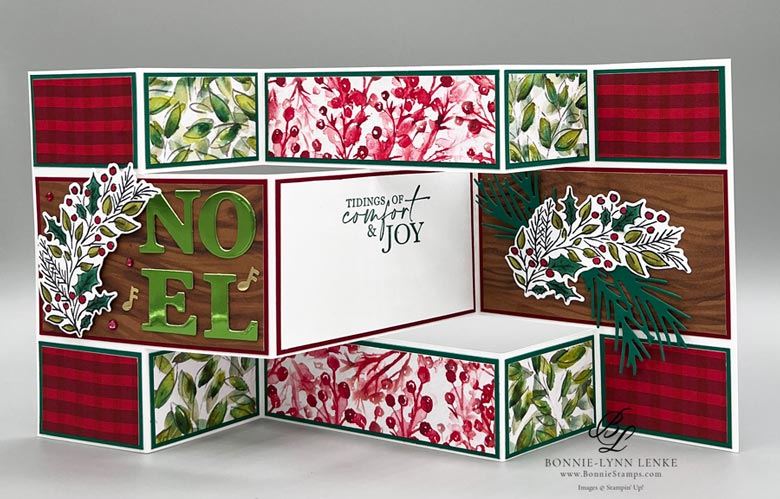
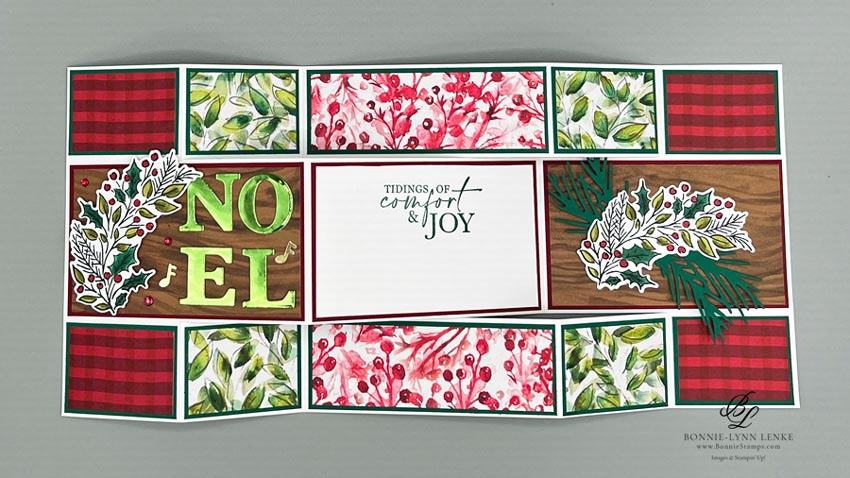
Today I’m sharing with you my take of the a Tri-Fold Card using the Joy of Noel Stamp Bundle. It’s been a long time since I’ve made this card which means it took me a couple tries to cut the paper right. I’m blaming that on a turkey hangover, Lol! Oh, the one cut wrong is now my pattern sample for next time I want to make it. It just took a little tape where I cut it wrong.
I recommend that you watch the video to see how to make the card base and for little suggestions I make when assembling this card. Should you decide not to watch the video, then please read through the directions for the first 6 steps before you make the card.
Writing card directions is the hardest part of making cards, especially creative fold cards. Do not let the length of these directions scare you off. This really is an easy card to make. The directions took longer to write than it took to make the card. Hopefully, you enjoyed this card and will give it a try. Happy Stamping!
Card Directions
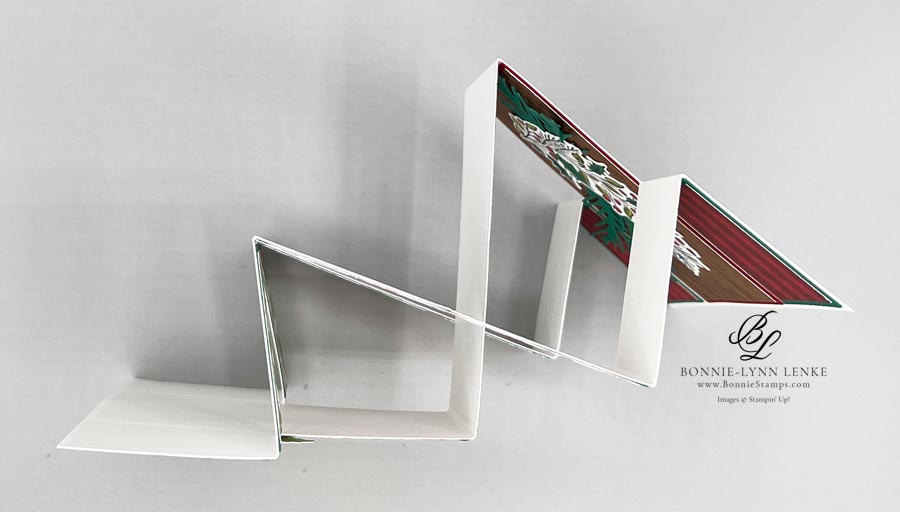
- Cut and score card base on the long sides: Score at 2” and then again at 10” from the top of paper down 1-1/2”. Now score from the bottom of paper up 1-1/2” (from 4” on your cutter to bottom at 5-1/2”). Score at 4” mark top to bottom then repeat at the 8” mark.
- Turn card base so short side is at top of trimmer, place paper at the 1-1/2” mark. Cut the paper from the 2” to 10” score lines. Turn paper around and again place it at the 1-1/2” mark and cut this side from the 2” to 10” score lines.
- Starting at the left hand side of card base the 2” score lines (top & bottom only) are mountain folds. The 4” score line top & bottom folds are valley folds while the middle section is a mountain fold. The 8” score line top & bottom folds are mountain folds while the middle section is a valley fold. The 10” score line (top & bottom only) are valley folds. See video on how to score, cut and fold card.
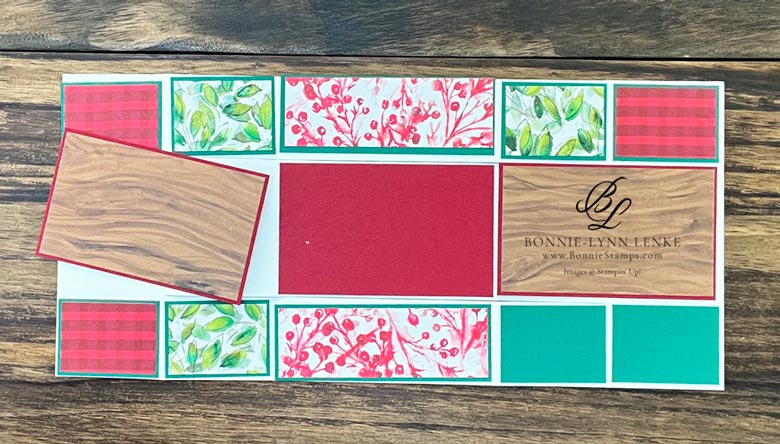
- Lay the Shaded Spruce & Cherry Cobbler Cardstock pieces on the sections where they go (see pictures for layout placement). We do this to make sure the cardstock pieces don’t need to be trimmed from score lines being a little off. Once you are happy with the way everything fits, adhere the Designer Series Paper to the cardstock and keep them in the correct layout if you had to make any cutting adjustments to cardstock and/or DSP.
- Once you have the Designer Series Paper & Cardstock assembled adhere them to the card base.
- Stamp the Greeting in Shaded Spruce Ink on the White Cardstock panel. Adhere this panel to a Cherry Cobbler panel then adhere to the middle section of the middle row.
- Stamp the holly & berry stamp on White Cardstock with Memento Black Ink, you need 2 images. Use Stampin’ Blends to color as follows: Berries – Light Cherry Cobble & Dark Red, Leaves – Granny Apple Green blends & the Holly with the Shaded Spruce blends. Crop both images with corresponding die.
- Using the Granny Apple Green Foil, crop the “NOEL”. Attach each letter, using Glue Dots, to the first section of the middle row, leave room for berry image. I started with the “O” first follow by the “N”, “E” and finally the “L”. Hint: Add Adhesive Sheet to back of foil before cropping instead of using glue dots to adhere.
- Adhere one of the images with Dimensionals placing to left of the “NOEL”. The other image is adhere to the last section of middle row with a couple glue dots (you will be sliding pine branches under 2 of the sides.
- Crop 2 pine branches with the die from the Christmas Classics stamp set from Shaded Spruce Cardstock. Carefully, slide the branches under image edge and adhere with glue dot. You might need to cut a little bit off bottom of pine branch. Also, pay attention to where the branches are so they don’t interfere with card closing.
- For embellishments add a couple music notes around the “NOEL” using a drop of glue for each. Then color 3 Rhinestone Basic Jewels with the dark Cherry Cobbler Blend, let dry a moment and adhere to card front.
- The envelope was finished by stamping with holly & berry image to bottom left of envelope in Shaded Spruce Ink. Put a piece of scrap paper inside of envelope under the image. Color the image with the light red, light shaded spruce and light granny apple green blends.

Card Recipe
Cutting Directions:
- Basic White: 5-1/2” x 12” (see directions steps 1 – 3 for scoring, cutting & folding)
- Basic White: 2-1/4” x 3-3/4” (greeting panel)
- Shaded Spruce: (8) 1-3/8” x 1-7/8”, (2) 1-3/8” x 3-7/8” (these are top & bottom rows)
- Cherry Cobbler: (3) 2-3/8” x 3-7/8” (middle row)
- Joy of Noel Designer Series Paper: (4) 1-1/4” x 1-3/4” (red checkered pattern), (4) 1-1/4” x 1-3/4” (green leafy pattern), (2) 1-1/4” x 3-3/4” (red berry pattern), (2) 2-1/4 x 3-3/4” (woodgrain pattern)
- Melon Mambo & Granny Apple Green Foil Sheets: 3-1/2” x 3-1/2” (NOEL)
Supplies Used:
- Stamps: Joy of Noel, Christmas Classics
- Dies: Joy of Noel
- Cardstock/Paper: Basic White, Shaded Spruce, Cherry Cobbler, Joy of Noes Designer Series Paper, Melon Mambo & Granny Apple Green 12” x 12” Foil Sheets
- Stampin Pads: Shaded Spruce, Memento Black
- Stampin’ Blends: Granny Apple Green, Shaded Spruce, Cherry Cobbler, Real Red
- Embellishments: Loose Holly Gems & Sequins, Rhinestone Basic Jewels
- Adhesives: Dimensionals, Glue Dots, Liquid Glue
- Tools: Paper Trimmer, Cut & Emboss Machine, Clear Blocks, Take Your Pick, Bone Folder, Stampin Pierce Mat, Paper Snip Scissors
Check out this month’s Specials:
Click on an image for more information…
Sale: $9.00
Price: $10.00
