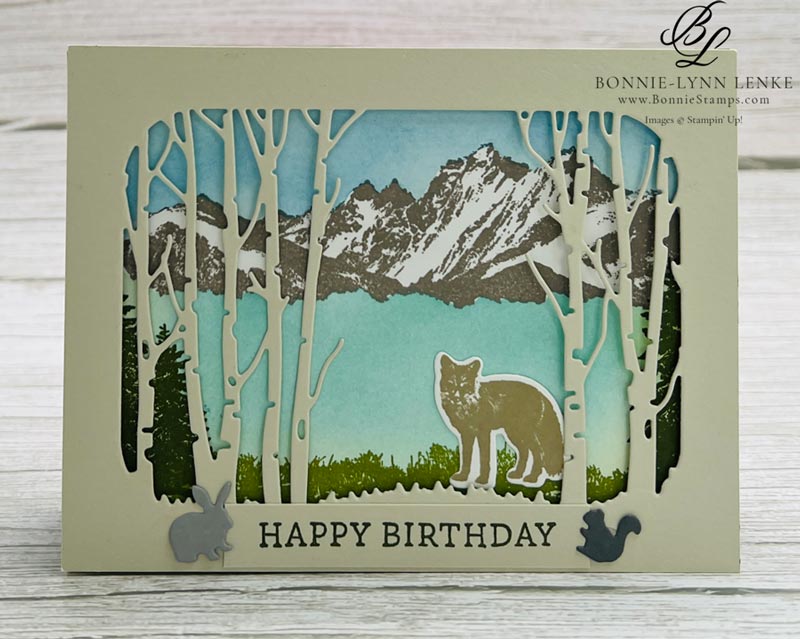
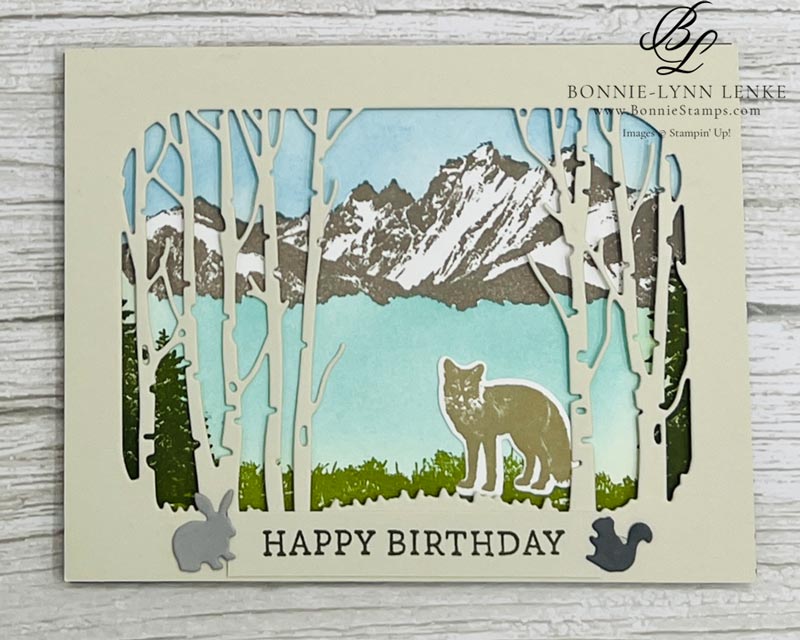
Today, we will create a scene using Ink, Stamps, Masks, and Blending Brushes. The featured stamp bundle is the In The Grove set by Stampin’ Up! The video will give you complete instructions on how to make this card. I find creating cards like this very relaxing and forgiving if or when you have a booboo. Happy Stamping!
Card Directions
- Cut and score all cardstock and papers as listed under Cutting Directions below.
- Fold the Mossy Meadow Card Base in half on the score line, and burnish it with a Bone Folder.
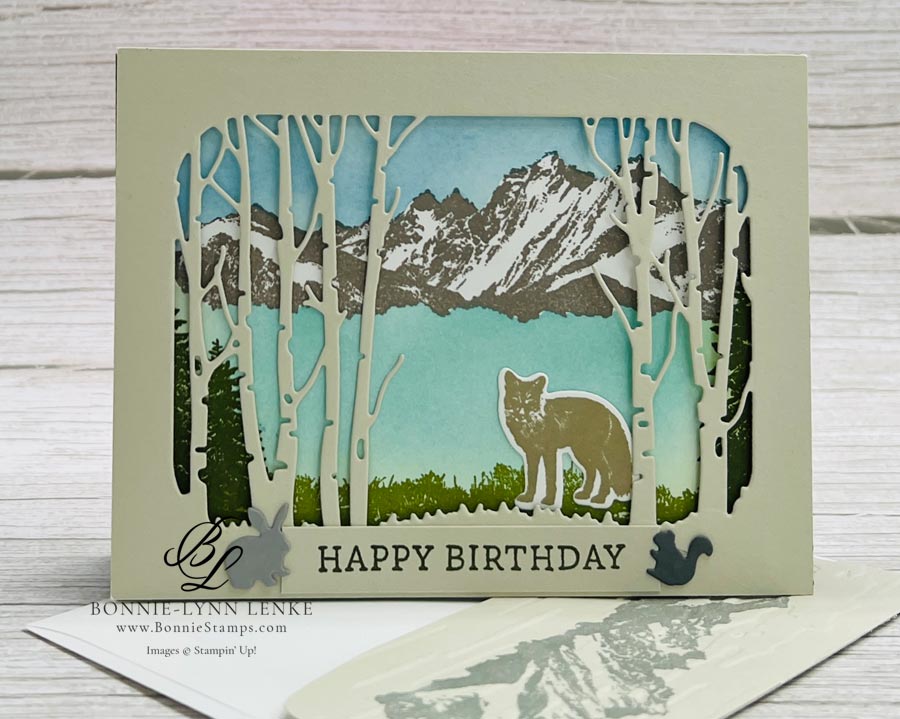
- Stamp the mountains on a 5-3/8” x 4-1/8” Basic White Cardstock panel. Stamp the image again on masking paper and die-cut it out. Place the mask over the mountains with just the very top of them showing (see photo below). Using a Blending Brush, add color to the sky with Balmy Blue Ink and then add Blueberry Bushel for a deeper blue.
- Adjust the mask so the bottom of the stamped image shows just a little bit. Continuing with the Blending Brush, add Pool party Ink for water, leaving room on the bottom and sides. Use Old Olive Ink on the sides and bottom.
- Stamp the grass on the bottom from edge to edge with Old Olive Ink then stamp the trees on each side in Mossy Meadow Ink. Adhere to Mossy Meadow Card base.
- Die-cut the large scenery die by centering it on a 5-1/2” x 4-1/4” Basic Beige Cardstock panel, then adhere to the card front with Stampin’ Dimensionals.
- The fox is stamped in Crumb Cake Ink on Basic White Cardstock and then cut out with the coordinating die. Use Glue Dots to adhere to the card front.
- Stamp the greeting in Mossy Meadow Ink on a 3” x 1/2” strip of Basic Beige Cardstock, then adhere to the bottom center of the card front.
- Die-cut the squirrel from Basic Grey Cardstock and the rabbit from Smoky Slate Cardstock, and add them to the card front with Glue Dots.
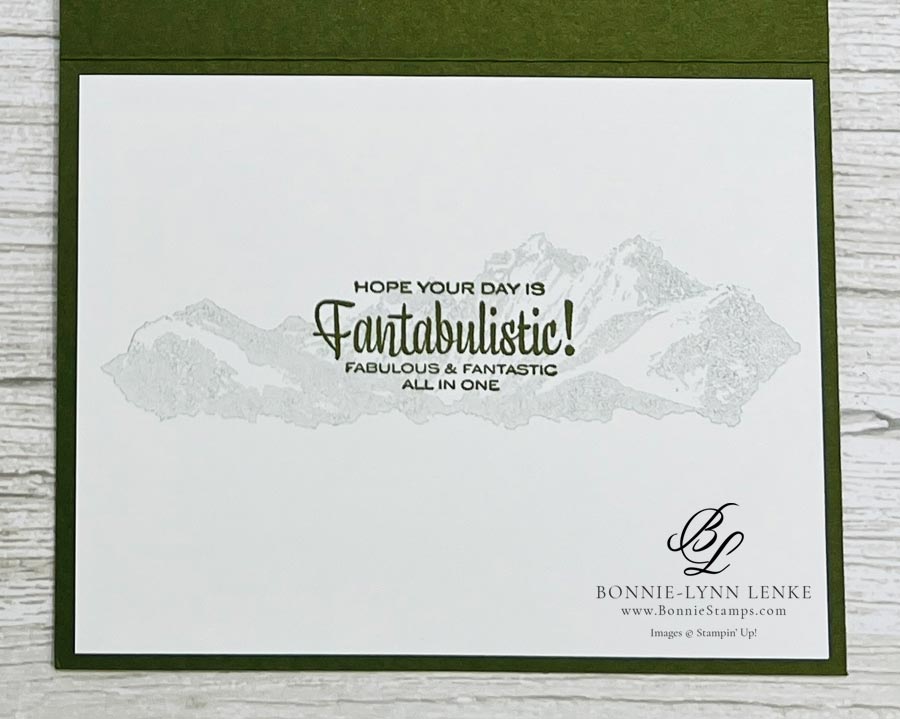
- For the inside, I stamped the mountain image in Gray Granite Ink on a 5-1/4” x 4” Basic White Cardstock panel after stamping it off twice before stamping—stamp sentiment in Mossy Meadow Ink over the light mountain image.
- The envelope flap was dressed with a panel of Basic Beige Cardstock. Stamp the mountain image on it in Gray Granite Ink and emboss it with an Embossing Folder for added texturing. I used the Bark Wood 3D Embossing Folder that will be coming out in the September to December Mini Catalog, or as I like to call it, the Holiday Catalog.
Card Recipe
Cutting Directions:
- Mossy Meadow: 8-1/2” x 5-1/2”, scored at 4-1/4” (card base)
- Basic White: 5-3/8” x 4-1/8” (front panel), 5-1/4” x 4” (inside)
- Basic Beige: 5-1/2” x 4-1/4” (front), 3” x 1/2” (greeting), 6” x 2-1/2” (envelope flap)
- Gray Granite: Scrape (squirrel)
- Smoky Slate: Scrape (rabbit)
Supplies Used:
- Stamps: In The Grove, Simply Said, So Sentiment (retired)
- Dies: In The Grove
- Cardstock/Paper: Mossy Meadow, Basic White, Basic Beige
- Stampin Pads: Smoky Slate, Balmy Blue, Blueberry Bushel, Pool Party, Old Olive, Mossy Meadow, Crumb Cake,
- Embossing Folder:
- Adhesives: Dimensionals, Glue Dots, Stampin Seal, Liquid Glue, Tear & Tape
- Tools: Paper Trimmer, Cut & Emboss Machine, Clear Blocks, Take Your Pick, Bone Folder, Stampin Pierce Mat, Paper Snip Scissors
Stampin’ Up! Stamp/Bundle and Die-Cut Machines Sale!
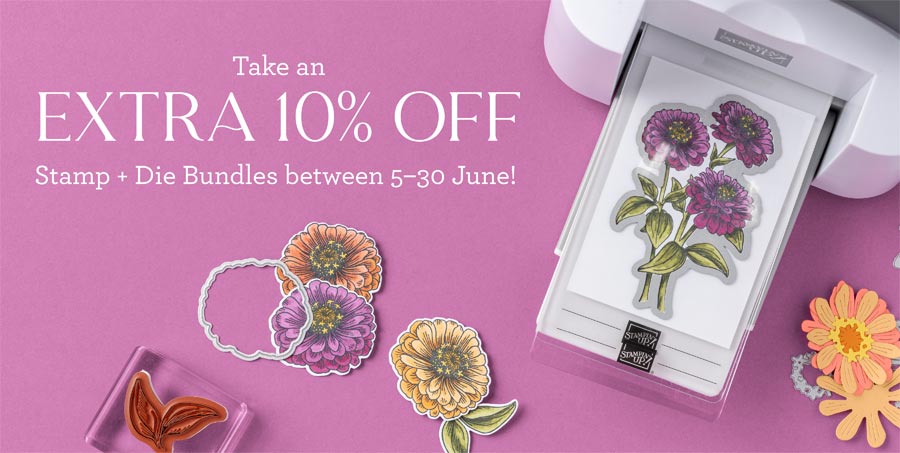
***Now Through June 30th, receive an ADDITIONAL 10% off of all STAMP/DIE BUNDLES and Stampin’ Cut & Emboss Machines, both the regular size and the Mini one!***
Check out this month’s Specials:
Click on an image for more information…
Card Keeper Kit